Independent Lesson
This feature lets you create a lesson or save it for later use. It also allows multiple educators to collaborate on creating different documents directly from the account library. This makes teamwork easy and helps educators efficiently create and manage content in real time.
How to Create an Independent Lesson
Follow these steps to create an independent lesson efficiently:
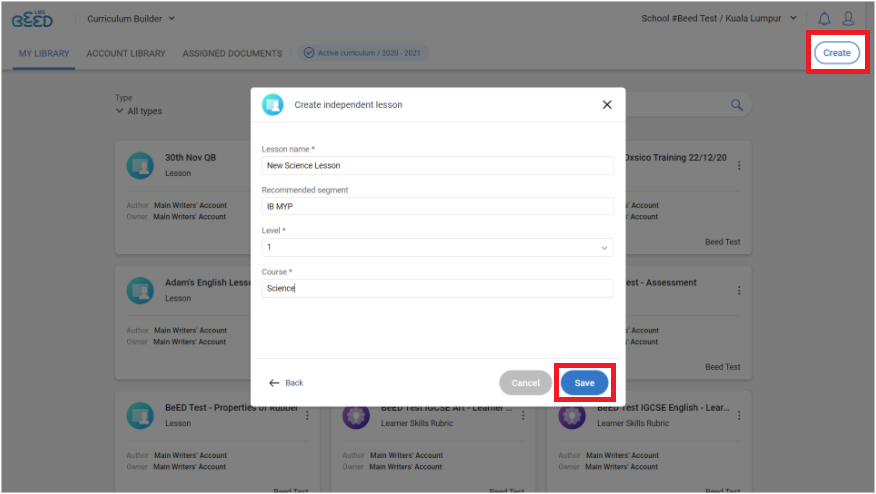
Step 1: Start in My Library
In the My Library section, click Create in the top-right corner.
From the list of document types, select Lesson.
- Fill in the required fields and click Save.
Important: Make sure you select your Course from the drop down menu. If your Course doesn’t appear, please contact your Administrator to add it in the Admin Panel
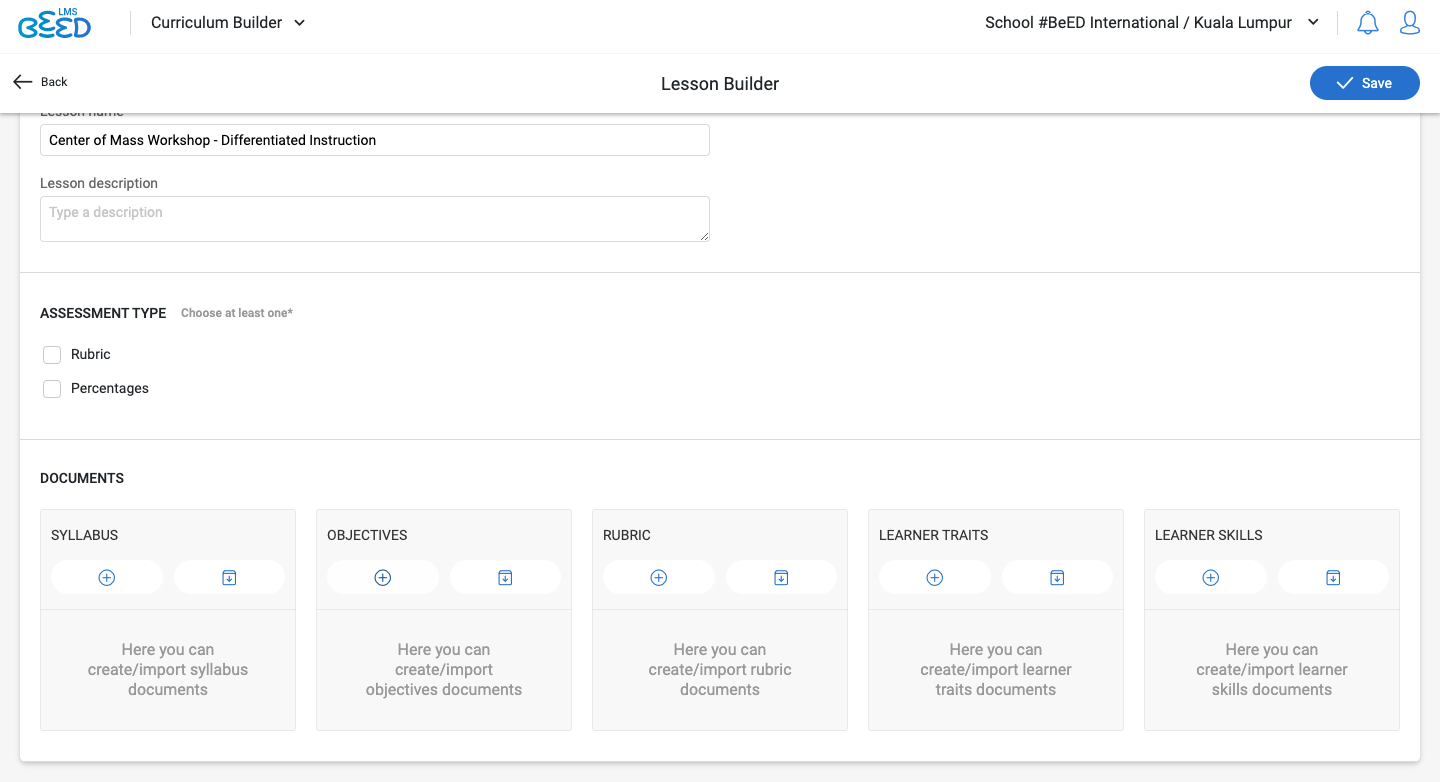
Step 2: Complete the Basic Info Tab
Enter the Lesson Description and select the Assessment Type.
(Optional) Import or create additional components for the lesson by clicking the plus (+) or import icon for each:
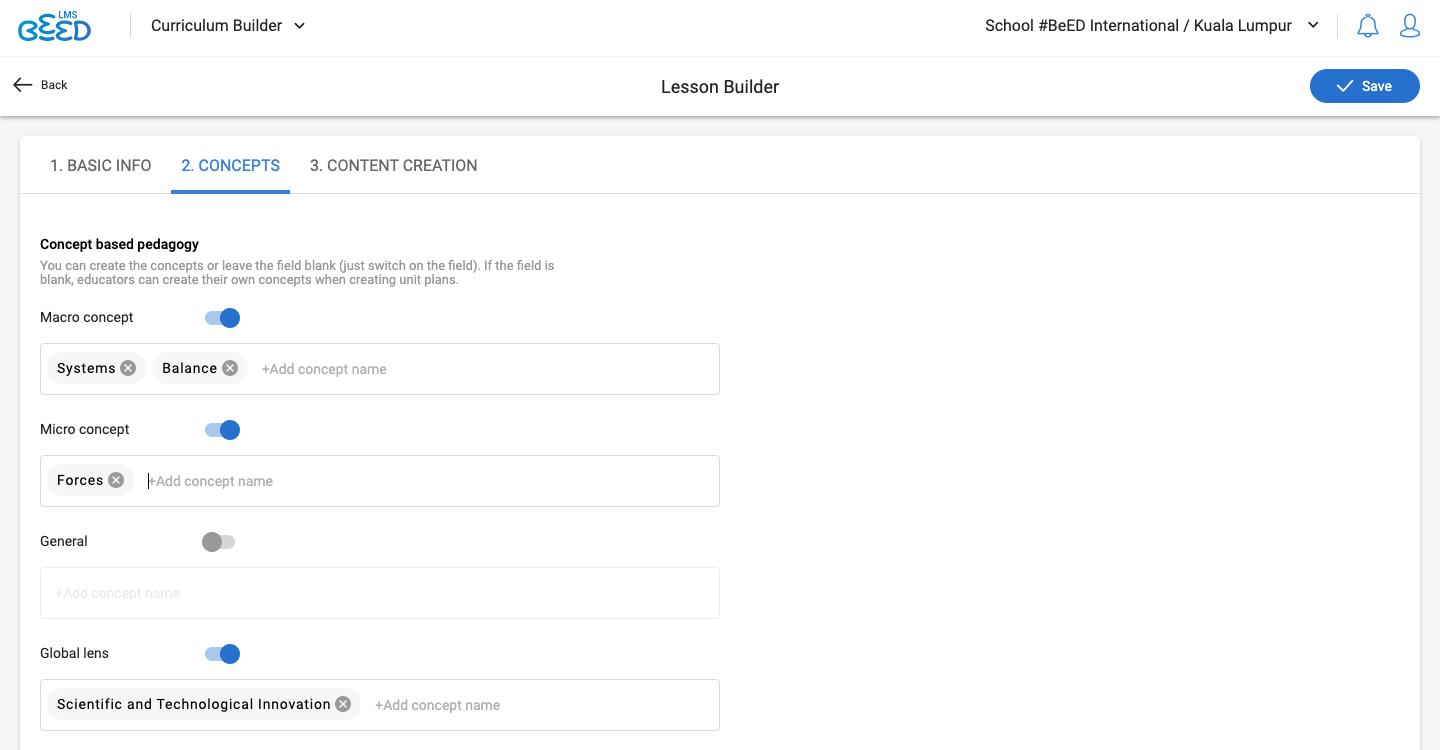
Step 3: Configure the Concepts Tab (Optional)
Toggle on the relevant pedagogical methodologies.
Insert information into the corresponding fields.
For multiple concepts, press the Enter key after each new input to create a list of concepts.
Step 4: Design the Content Creation Tab
Fill in all the necessary fields in the upper half of the page.
Take a look at this video if you trouble while designing the Content Creation Tab
Add a learning roadmap by:
Clicking on the pencil icon in the top-right corner of the Main Map section.
Uploading an image (e.g., an outdoor learning map or a mind map of lesson topics).
For templates or inspiration, download map ideas here or refer to external creative map resources.
Step 5: Add Points and Stages
Click on the first icon on the left of the map to Add New Point.
Drag the Point to its desired position on the map.
Click the + icon below the map to add new stages to the Point.
Enter the Stage Name and complete the required fields.
Click Create Stage in the bottom-left corner.
Use the pencil icon to edit or the trash icon to delete a stage.
Step 6: Add Lesson Blocks and Question Blocks
Click + Lesson Block or + Question Block to structure your lesson.
Drag the blocks forward or backward to rearrange their order.
To delete a block, click the trash bin icon in the top-right corner of the block.
Refer to these helpful videos for more guidance:
Step 7: Save Your Work
Once all components are finalised, click Save in the top-right corner of the page.
We're here to help! 😊 If you have any questions or need more details, just reach out. Our team is always ready to assist and make things easier for you! 🚀
Other related links
- How do I import questions from the Question Bank?
- How do I insert equations into my Lesson?
- How do I integrate Zoom or other conferencing tools into my Lesson?
- How do I add plagiarism checking into my Lesson?